Items you will need:

* Sturdy Scissors
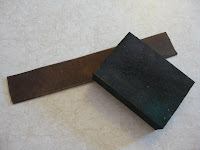
* Plain leather belt
* Piece of Notebook paper
* #2 Pencil
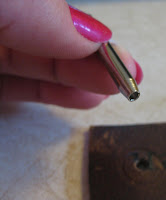
* Snap setting kit (Line 20 for thin leather or Line 24 for thicker leather)
* Cutting Board or other hard surface
* Hammer/Mallet
* Sanding Block
* B&W Sharpies, Paint Pens or India Ink and Calligraphy Pen
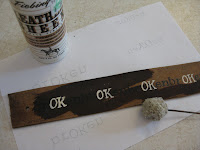
* Leather Sealant and applicator (if necessary)
Measure your Wrist: Using the notebook paper, cut and wrap a strip around your wrist to a comfortable fit. Overlap the edges by an inch. Tear off paper to size.


Cut out your bracelet blank: Lay the paper over your belt and cut the leather to the exact length of the paper.

Prepare your bracelet blank: Sand leather until any topcoat/shine is eliminated. Using a slightly damp paper towel, wipe off any dust. Mark holes for snaps 3/4" from both ends. Double check fit around wrist, make any necessary adjustments to hole markings. Using punch included in snap setting kit, center punch over marked holes on leather, atop your cutting board. (This works on any solid surface such as an anvil, scrap of granite, etc.) Hammer punch through leather (like a nail) to create snap holes. Wipe off leather again. Set aside to completely dry.


Prepare your template: For the example above, I used the Courier font in Microsoft Word. I then print the word "brOKen" several times in different sizes. Sometimes I only type the "br" and the "en" and then by hand write the "OK" in script. Decide on your favorite font and size for your leather. Trim edges of template to exact edge of design. On back side of template completely color over letters with pencil lead.


Transfer design to leather: Center template on leather, right side up. Using adequate pressure, with pencil, trace design. Remove template to find design transferred to leather.


Ink design on leather: Using sharpies, paint pens, or calligraphy pen, permanently mark design in ink. Allow to dry completely. Repeat this step if necessary for even coverage.


Protect design and leather: Apply a thin coat of leather sealant. I use Fiebing's brush on Leather Sheen. The spray kind works, too. Allow to completely dry. Whatever type, several thin coats are the key. Repeat this step at least one more time. If you prefer a slightly worn finish, lightly sand over the entire leather strip twice. Then angle sand block and concentrate on roughing up the edges only.

Set the snaps: This part is a little tricky to describe. Read the directions in the snap setting kit and then I suggest you follow my photos as well. Once the two sets are matched and laid atop leather be certain enough metal is left to "overlap" for sturdy setting. (You may have to push leather down around shafts.) You can use the tiny anvil included to hold in place while setting---smooth hollow side for top of snap, flip side with small column for bottom of snap. I usually hammer once or twice more without the anvil, just to ensure a tight hold.


Wear and share!
* Have fun trying this with your own meaningful words/designs. If you publish my "brOKen" design in photos or in other media, please give me credit for the design by linking here. Thanks!
* Most of the supplies for this project can be purchased at Wal-Mart or your local hobby store. You will likely be able to purchase pre-made leather bracelet blanks there, too. Otherwise have fun scavenging your closets and thrift shops. You might already have an aerosol leather protectant next to a pair of leather shoes in your closet. If you are going to make several of these, the three things I'd suggest you special purchase are a leather hole punch (pictured below) and the line 24 snaps and setter from your local Tandy leather or Tandy online store. I started with those three items; by now I own a bench hand press, but I've also set hundreds of these snaps. I have found the line 24 to be the sturdiest money can buy.


4 comments:
i LOVE this theme. your designs are amazing! and you humbly share your talent. thank you and keep creating! hugs!
So sweet..very generous of you ♥
ello! I found your tutorial.
I would like to translate it into Russian and post it in my site. I will mention you and your site (let me know which one).
Is it possible? What will be your condition?
Delia
My site is www.tatianka.ru
Post a Comment